General Kilpatrick's Cavalry Raid
|
|
This Site:
|
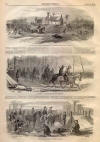
HARPER'S WEEKLY. [APRIL 1, 1865. 204 GENERAL KILPATRICK RECAPTURING HIS HEAD-QUARTERS, MARCH 10, 1865GENERAL KILPATRICK'S OPERATIONS.IT was at Aiken, a few miles northeast of Augusta, that KILPATRICK fought his first battle. Here the Second Brigade under General ATKINS encount- There was no other engagement until March 10, when KILPATRICK came into collision with WADE HAMPTON'S command. KILPATRICK was pushing forward in order to reach Fayetteville before HARDEE, and strike him in the flank, or, failing in this, to intercept HAMPTON, who was following in HAR- not all up, two of the brigades being behind on account of the bad roads: In this situation KILPATRICK was attacked by three divisions of rebel cavalry. He was obliged to abandon his head-quarters and two pieces of artillery until he could bring his command together. But HAMPTON did not keep loss was not over a hundred, while the enemy left upon the field seventy-six killed, and his wounded must have numbered several hundred. We illustrate this bathe on this page. We also give two sketches showing SHERMAN'S foragers, or "bummers," as the soldiers call them, setting out FORAGERS "STARTING OUT" IN THE MORNING.ered WHEELER'S command. Falling back so as to receive the support of the other brigades, ATKINS awaited the attack of the enemy, which was repulsed. DEE'S rear. HARDEE made better time than KILPATRICK, moving out from Coleman's Grove just as the latter entered it. KILPATRICK'S cavalry was the ground long. KILPATRICK soon returned, and, leading his men on in a furious charge, swept the field and regained his camps and artillery. His from and returning to camp. These foragers not only collected provisions, but also acted as fankers and advance skirmishers. FORAGERS RETURNING TO CAMP AT NIGHT.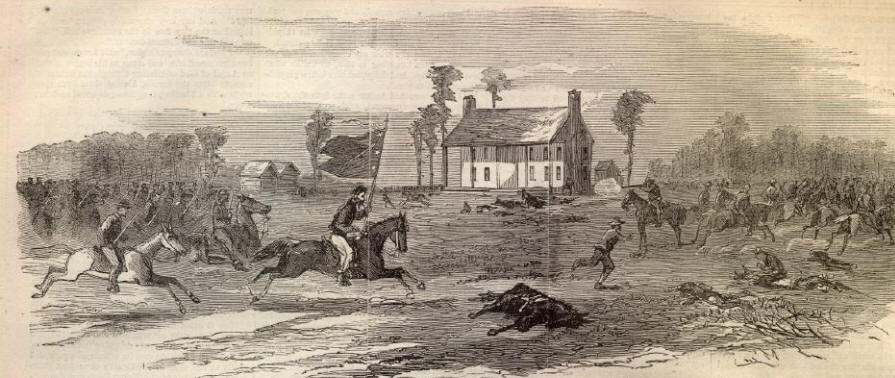 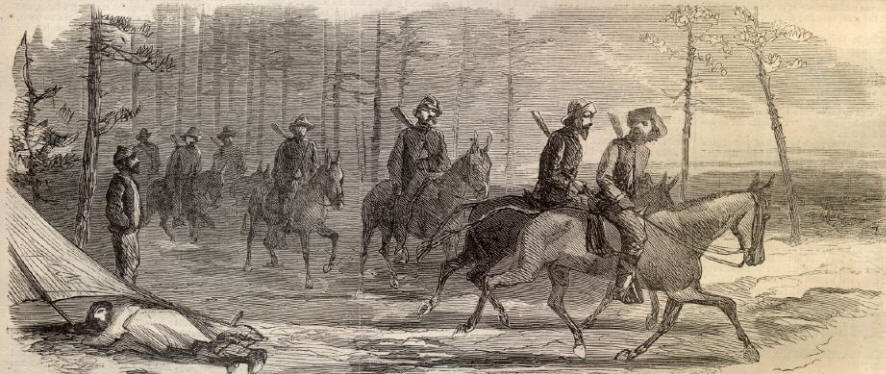 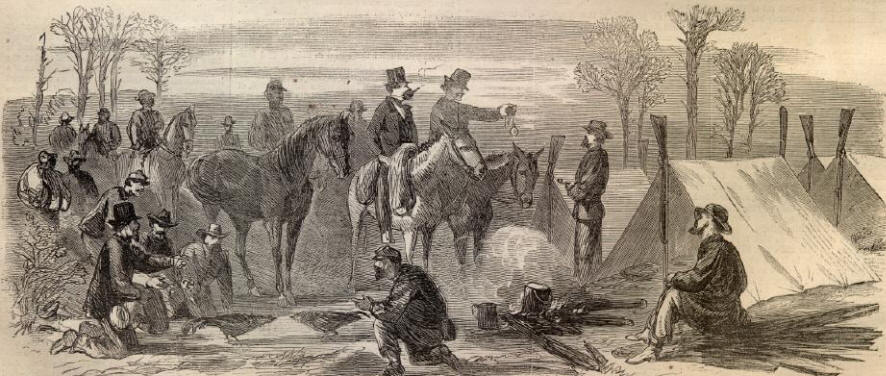 |
||||||||||||||||||||||||


|
|
||
|
|
Site Copyright 2003-2018
Son of the South. For Questions or comments about this collection,
contact paul@sonofthesouth.net
|
|
|
Are you Scared and Confused? Read My Snake Story, a story of hope and encouragement, to help you face your fears. |
||